Club Log Tools
IMPORTANT: Club Log requires SSL connections with TLS 1.2 which is only supported in Windows Vista or higher. If you have Windows XP all Club Log functions will be disabled
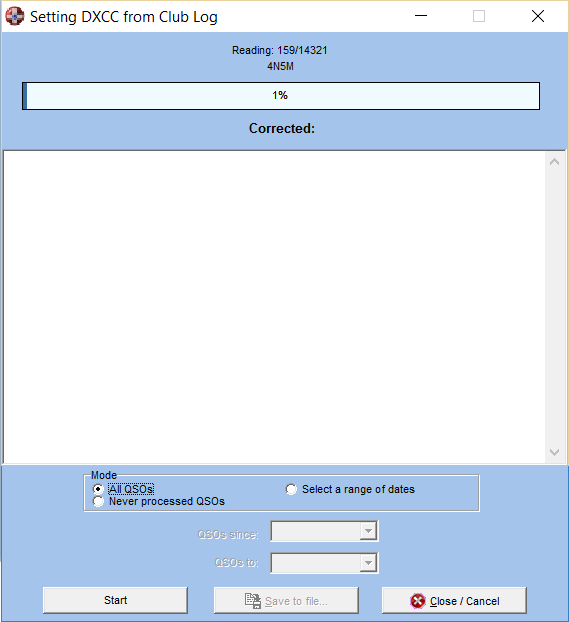
Club Log (www.clublog.org) is an online database with a suite of powerful tools supporting active DXers. Registered users after uploading their logs in ADIF they get online access to some functions such as DXCC personal reports, propagation prediction, Dx spots with customised filters, OQRS, etc. Swisslog implements most of these functions since long time ago. However Club Log is currently the best resource for DXCC allocations and to know whether a QSO is valid for DXCC or not. All uploaded logs in Club Log are analyzed for:
Possible/likely errors in the DXCC allocations
Invalid QSO: maybe not accepted by the DXCC desk, pirate or not valid operations etc.
After the log has been processed user will receive a full and detailed report via e-mail informing which QSO are not valid and why. Club Log also requests OQRS automatically for you in many cases. I really think Club Log is a "must" for serious DXers. In order to make things easier to Club Log users, I have integrated full Club Log support in Swisslog. Needless to say that you need internet connection to use this excellent tool!
Select Tools | Club Log from the main menu. The following options are available:


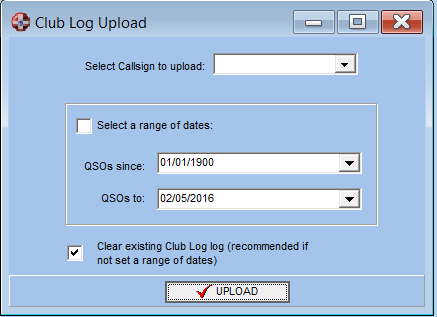
Use this function to upload your logbook into Club Log. Select the callsign to upload from the dropdown list (contains all callsigns added in all your My QTH).
NOTE: If you have not configured yet your Club Log log in details in Options | Online Logbooks, Swisslog will prompt you to enter the log in details the first time you run this function.
You can upload QSO within a range of dates. This is useful in very large logbooks to split the upload by periods of time or when you import QSO from another program and you want to upload only these QSO to Club Log instead of the full logbook. The range of dates used will be saved so that next time you open this function user knows the last range of dates used. If this option is not checked (unchecked by default) the full logbook will be uploaded.
The Clear existing Club Log log (recommended if not set a range of dates) option is checked by default. This way all previous QSO will be deleted in Club Log before uploading your log. This is very useful to make sure the QSO information in Club Log matches with your logbook. Maybe you have changed some information in some QSOs and if you don't check this box you won't have a perfect synchronisation with Club Log. This option is unchecked automatically when clicking the option "Select a range of dates" to allow merging the selected QSO in Club Log.
When you are ready press the Upload button. Swisslog will export all QSO (or the selected ones within the range of dates) from the selected callsign in an ADIF file then uploaded to Club Log. The ADIF file will be saved in the Clublog folder (located where Swisslog is installed) with your callsign and current date as file name in the following format: CALLSIGN_YYYYMMDD.ADI. If everything is OK you will get a message that your upload is accepted and queued. Otherwise you will get an error message informing you what have gone wrong.
With this function you will handle easily the requested QSL via Club Log OQRS (Go to Tools / Club Log / Process OQRS ADIF File). Swisslog uses both QSL ACTION and QSL SENT fields to know your OQRS requests and whether you have already sent the QSL card or not.
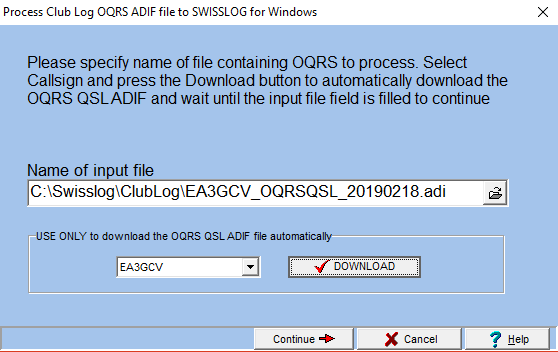
The first step is processing your OQRS request file (the file including QSL requests via Club Log). It's a very simplified Import QSOs function to process the format of the Club Log OQRS files. You can either load the file manually or use the automatic function (recommended). Simply select the callsign you want to check for new OQRS in the drop down list and press the DOWNLOAD button. Swisslog will log in in your Club Log account, will download and will save the OQRS QSL ADIF file in the Club Log folder. All this process is performed automatically!. When finished, it will fill out the OQRS full path and filename automatically in the "Name of input file" field. This will be the indication that everything went well:

The QSL_SENT field in this ADIF file will contain a Q in those QSO where a QSL has been requested (but the QSL has not been sent). During this first process, Swisslog will set the QSL ACTION field according to this rule:
if the QSL_SENT_VIA contains a B, the QSL ACTION will be set to OQRSBureau.
if the QSL_SENT_VIA contains a D, the QSL ACTION will be set to OQRSDirect.
Now press the Continue button and press Finish in the next dialog. Swisslog will display a detailed report for every QSO where a QSL has been requested including the QSL ACTION set (OQRSBureau or OQRSDirect) as well as the previous contents of this field. A blank report means: no new QSL request has been found. Close the window when finished.
Now we need to print these QSOs and set the QSL_SENT indicator accordingly in Club Log. If you print labels or QSL Cards with Swisslog now it's time to do it by using the Print QSL card wizard. Remember to select the QSO where QSL ACTION is equal to OQRSBureau and/or OQRSDirect and follow the procedure of the wizard. Once you have finished printing (or if you use Club Log to print labels), perform the following steps:
Log in in your Club Log account then click in the OQRS section and press the "OQRS Management Tool" according the callsign you want to print QSOs.
Select a Label Type and the QSOs which are pending to print and press the "Print Selected Label" button. Club Log will display the following dialog:

Press the HERE link to display a preview. Print labels here ONLY if you want to use this tool from Club Log! Otherwise continue reading. You will get the following dialog:

If you print labels with this tool, make sure labels have been printed correctly. If you have already printed labels/QSLs with Swisslog continue reading!
Now, press YES to mark these QSO in Club Log as sent (QSL SENT = Y).
The following dialog will be displayed:

IMPORTANT: If you printed labels/QSLs with Swisslog and you already set the QSL SEND indicator in the Print QSL card wizard, you can skip this step and stop here! Otherwise, press YES to download and save the ADIF file of your printed QSO (remember the file name and full path!).
If you printed labels with Club Log or if you used Swisslog to print and you didn't set the QSL SENT indicator with the wizard, now you will have to process the file downloaded in the second step in order to update the QSL SEND field in Swisslog:
Start again this function: Tools / Club Log / Process OQRS ADIF File
But this time, in the first step (Processing the OQRS file) you have to load manually the ADIF file saved in step 2 (the one containing your printed QSO). The QSL_SENT field in this OQRS file will now contain Y instead of Q in every QSO, because a QSL card has been printed. Swisslog will change the QSL_SENT field accordingly in the affected QSOs. The detailed report at the end of the process will show you the QSOs that have been modified.
Repeat this procedure from time to time and you will have all your OQRS request from Club Log under control!
Copyright © 2016 SWISSLOG
Last modified:
25 abr. 2019